Popular Posts

Friday, May 20, 2011

RISOTTO WTIH SAFFRON

Arborio rice, organic garlic, carrots, broccolini and half an onion

I’ve wanted to post a very typically Northern Italian risotto recipe for some time.  That’s why I bought saffron last week…. It’s a crowd pleaser and the kind of dish that takes 25 minutes from conception to completion.
The very first time I ever made a risotto was in my uncle Giulio’s kitchen under his supervision at age 17 in the town of Lurate-Caccivio in the shadow of the Alps and Lake Como.  It was summertime and I remember how I really sweated over that pot.  Since then I’ve learned a few tricks to sweat less.
Saffron consists of the dried stamen from flowers, I've also got a sprig of fresh oregano from my garden, a dried laurel leaf, whole nutmeg and some dry porcini mushrooms I found at an Italian market.
This is going to be presented as a deconstructed risotto primavera with saffron.  For richness I’m going to add some freshly ground nutmeg and I’ll slice up some dry porcini mushrooms.  Though the saffron is expensive, a little goes a long way, but there's nothing quite like it so don't even try to skimp on it... it's actually totally worth it.
I used my electric grinder to mince 1 clove of garlic, ¼ teaspoon of red pepper flakes and a half onion.  To make it easier on the grinder I drizzled in 1 tablespoon of extra virgin olive oil (cold pressed of course) with a pinch of rough sea salt.  I pulsed till everything was very finely minced.  In fact, I scraped the sides down twice with a spatula and pulsed again to make certain nobody gets a  mouthful of onion or garlic in this dish - these will be subtle elements.  Note: If you don’t have a grinder or a cuisinart, use your chef knife and be patient till it all begins to approach a paste-like consistency.
Home made stock I made with my last blog entry's baked chicken
I’m going to use my own fresh stock (two jars worth) – you can also use boxed or canned, just go for the low salt, low fat chicken broth.  Pour them into a pot and cover till they begin to boil, then bring down to a simmer.  Add in your dry laurel.

I also want to peel and chop the carrots at this point.  As soon as they’re evenly sliced, I also throw them into the slowly simmering stock pot – I want to cook them just enough to still have some bite, not get mushy - NEVER mushy.  "Al Dente" means they give your teeth resistance and this is how you want your rice AND the veggies.
First I turn on the heat on the tall sided pot, splash a tablespoon of oil (e.v.o.o.) into the bottom and then throw in the onion/galic paste and stir with a wooden spoon till it’s all translucent.  Then, I add in my 16oz of pearl shaped Arborio rice and stir it till it’s all covered with the oil from the pan.  At this point, throw in the saffron too, the heat will activate it and make it very fragrant.  Also add in your nutmeg.  Spices always get activated in the heat.

Deglaze the pan with a ¼ cup of good white wine (I used last night's leftover pinot grigio).  Note: You should always cook with a wine you’d drink yourself.  Never use cooking wine.  If you don’t have wine on hand, a light white wine vinegar or rice vinegar can be used (1/8 cup water 1/8 cup vinegar) for this  – you want acid in the dish.  If you wish to skip it simply splash in a half ladle of your simmer stock (no carrots) into the pot to deglaze it... a few drops of lemon might do the trick.

From here on throw in two ladle-fulls of hot stock into your rice every few minutes.  Keep stirring occasionally.  Don’t allow the rice to go dry.  In other words, though this meal happens quickly, you can’t leave the kitchen while you make it or you’ll have burned rice porridge.  Add in a pinch of salt each time you add stock... this is how you layer in the flavor.
Don't forget to add in the porcini mushrooms - they'll add a lot of richness.
Keep stirring and adding stock till the stock is all used up and the rice is al dente.  Turn the heat off on your rice.  Now add in a pat of butter, any fresh herbs (I sliced up a sprig of oregano, basil can also be used at this point) and at most, a ¼ cup of grated parmesan and cover the pot.
Now, the vegetables can be stove top roasted in the dry pan over medium heat.
Allow your risotto to stand for 5 minutes.  Use the opportunity to set the table.

On Top Chef, Mr. Tom Collicchio always preaches that risotto should spread over the plate.  In fact, Italians don’t all agree on this.  I don’t want it to be dry, but I also don’t want it to be soupy.  It should be loose - relaxed.  If you add too much cheese – it will seize up on you and that’s bad.  If this happens to you, have some more hot stock on hand just in case, add in a ¼ cup at a time until you get it back to the consistency you like (I’m letting you be the final judge and arbiter on this point) before you serve.
Risotto from start to finish: 25 minutes.  I like my risotto moist, glossy and flavorful.  By adding the pan roasted veggies over the top, it becomes a deconstructed [and very modern presentation of] risotto primavera.  Only add a couple of turns on the parmesan cheese grater – it doesn’t need more.  BTW: I made enough for several friends and they’re almost here.  Enjoy this trip from my fond memories of my uncle’s kitchen to your table.  Let me know how yours came out and where you stand on the risotto debate (soupy or relaxed). 
NOTE: This risotto can be a whole meal in itself, or serve it in small portions as the first course.  If you’d like, follow it up with my last blog entry’s baked chicken, a green salad and finish it up with cake or strawberries.  That would be five-star dining, but it would take a bit more time to prepare.  Ciao!

Monday, May 16, 2011

FRENCHED BAKED CHICKEN

One of the biggest challenges in the home kitchen is to make something ordinary special.  Many of us struggle with the basics and end up eating out (hidden unnecessary calories, preservatives, and even rancid oils) or eating poorly (drive-through, etc).  Here’s a way to make a simple baked chicken sing without any added or unnecessary calories.  Remember: some of the most flavorful dishes are incredibly easy, and in the kitchen, ease = elegance.
I’m also going to end up with a great big vat of homemade chicken stock which I'll use in my next entry.  Let’s “French” a chicken (NOTE: this does not involve any tongue)...
To avoid cross-contamination keep the anti-bacterial detergent on hand.  Every time you touch the chicken you wash your hands.  This is always the strategy to follow whenever we touch any raw flesh (be it beef, pork, fish or fowl).  Wash-wash-wash, and then when you’re done, moisturize.  But if you inadvertently touch the raw chicken and then the wooden spoon, that wooden spoon needs to go into the dishwasher for decontamination.  Another example: you touch the chicken and then grab the pepper mill - you've just cross contaminated.  I’m trying to photograph this process (“Frenching” a chicken) so each time I touch, I wash-wash-wash, otherwise I've put e-colli or salmonella (or both) on the camera.
After you’ve rinsed and patted the chicken dry (inside and out), I use my handy dandy extra sharp kitchen shears to snip off the drumstick knuckles and the last wing joints – these burn in the oven and add nothing to our bird - but will help enrich our stock. 
Next, just like when I deal with the veggies, I like to have an even flat surface to make sure everything cooks evenly – so it is with my bird. 
Flip it over so the breast is on your baking sheet and cut out the entire backbone. 
Next flatten it out (you’ll hear the wishbone crack as it opens) skin side up. 
Your bird is now Frenched and ready for marinade.
I like to prepare two different things for the bird – a wet marinade that’s nothing more than my go-to vinaigrette sans sugar or thyme (a tad of oil, some Dijon mustard and rice vinegar with fresh ground black pepper and a bit of kosher salt) I massage all of this into the bird while the oven gets hot (350 degrees F).  To make it extra flavorful, I invert the bird skin side down and massage the marinade into the flesh and add any left over for it to soak in.  It only needs 10-15 minutes to thoroughly do its job.
Next, I make a garlic paste – 3 cloves of softened garlic, a teaspoon of kosher salt, a ¼ cup of extra green virgin olive oil and my mortar and pestle.  Set the paste aside. 
I have a sprig of fresh rosemary from my garden (any fresh herb will work here such as oregano, basil, or sage) and I take the leaves off and mince them with my mezzaluna. (A Mezza Luna [or half moon] is a typically Italian double handled blade especially good for mincing herbs.  NOTE: Don’t put it on your bridal registry and don’t buy it for someone else – it’s very bad luck because it will slice up relationships). 
Take the paste and minced herb, spread over the skin of your chicken – I use a spatula to keep the garlic off my fingers.  The bell just rang, this means the ovens hote, the bird is ready – into the oven it goes for 55 minutes.
Voila – beautifully done baked chicken. 
Tent it (10 minutes) and serve.  Juicy and flavorful with a slightly crunchy skin – even if you’re watching your weight, you can taste a little of it and enjoy.  Accompany this not-so-boring chicken with your favorite greens and veggies.

THE STOCK
Into a large stock pot I put the holy trinity: half an onion (plus the peel, don’t throw it out) just rough chop, three carrots (just rinse and rough chop), and three celery stalks (wash and rough chop). 
I also throw in the garlic skins, a fresh sprig of oregano, some discolored basil leaves, a dry laurel leaf and the chicken back, drumstick knuckles and wing tips. 
I also throw in the gizzards, dry laurel leaves and then fill with water. 
Notice: no salt added.  Cover the pot and bring to a boil then reduce to a simmer for 55 minutes. 
Take off the heat, and skim out everything but the liquid (or pour through a strainer into a bowl).  The remaining stock is ready to be used.  I usually ladle it into jars and refrigerate overnight. 
Any fat will float and harden (take it out and have a salt-free, fat-free stock on hand for your next extravaganza).  We’ll make use of this in my next entry.  I hope you enjoyed this little foray from my kitchen to your table.  Let me know how your baked (Frenched) chicken came out.
This half onion is being saved for our next endeavor - a savory surprise... it also involves saffron!

Thursday, April 7, 2011

MARMALADE A L’OGNION

Some of the most flavorful dishes are incredibly easy.  A Caprese salad only has three ingredients: sliced tomato, sliced buffalo mozzarella and basil leaves (which you then drizzle with extra virgin olive oil – evoo – and a bit of balsamic vinegar,  salt and pepper).  A fantastic tapenade consists of pitted olives, evoo, garlic and salt milled into a paste.  Hummus is another perfect example: chickpeas, lemon juice, garlic and evoo.
Here is a flavorful side dish or condiment in that same style – an onion marmalade.  Don’t let it scare you – all it requires is really good onions, a bit of oil, a dash of salt, thyme and some patience.  I was given a huge bag-full of lovely organic onions by my neighbor – from her mother’s farm.  We’re grilling steaks, roasting potatoes, there’s an arugula salad with my go-to salad dressing and I didn’t want this lovely gift to go bad on the counter.  First order of business was to peel off the outer skins and root ends.  Rinse off any dirt, then begin to slice them all nice and even.  Go slow as you slice, it’s not a race, don’t put stress into the pan and don’t lose any fingers.  Remember: dull knives cut fingers.
I had a total of 12 onions – it sounds like a lot, but the slow cooking process will reduce them considerably.  As they reduce, the flavor will become very concentrated: YUM!
Throw the slices into a large wide pan with a tight-fitting lid.  The bottom of the pan should have 1 tablespoon of evoo, and another one of safflower oil (or another flavorless oil) because it withstands higher heat, is flavorless and will actually enhance the olive oil's heat resistance for the process.  I’m also going to grab some thyme from my garden (2-3 sprigs) though 1 tablespoon of dry thyme, crushed between your fingers to release the flavor will work almost as well.  Add a tablespoon of sea salt (over 1.5 lbs of onions – the salt will help them go sweet as they cook slow).
Initially I start them on the highest heat – I also want to separate all the layers and coat everything thoroughly with the oil, salt, and thyme.  I use a wooden spatula for this.  Then, as they begin to get glossy, I’ll put the lid on it and bring the heat down to med for 15 minutes.  Note: If it’s an electric stove, switch burners so you don’t burn the bottom (burned onions are not what you’re trying for).

As they begin to brown, give it all a good stir and take the lid off, but hold your horses and allow the flavors to develop.  Every few minutes you can walk by and stir it until it begins to caramelize.  In my kitchen (because of the humidity in S. Florida, my gas stove, etc.) it took 45 minutes.  It might be less in yours – but this is what you’re going for: slightly golden, slightly sweet and very flavorful!
If you’re concerned about the oil, separate the solids, decant into a dish and serve as a condiment to a great grilled steak, lamb, chicken or pork.  Enjoy this little trip from the South of France, to my kitchen, to your table.
Let me know how yours turns out!  Mine was so good it stood up to a hearty glass of Bordeaux on whole wheat bread.  Ah!  Provence!
This simple dish is chock-full of flavor.  Enjoy!
 

Wednesday, March 30, 2011

EMERGENCY CHOCOLATE CAKE

EMERGENCY CHOCOLATE CAKE
Nothing scares most of us as much as baking – and rightly so.  Cooking is all about doing things with your own sense of style.  Baking is scientific – biochemistry taken to the nth degree.  My sister’s birthday was coming up and I hate store bought cakes – they’re always greasy (they use heavy greasy vegetable oils) and a terrible combination of bland cake with  oversugared frosting: TERRIBLE.  My sister was having a birthday and all birthdays after 35 require emergency doses of chocolate.
I searched through recipes in my books and on-line for a couple of days.  I finally settled on one online culled from Gourmet Magazine 1996 called “Stout Chocolate Cake.” 
As to the cake: I followed the recipe to the letter.  Though I’ve been cooking since my teens (a long time) – baking a cake is ALWAYS an ambitious undertaking… and it even scares me.  I’ll include the recipe for the cake at the bottom of this entry and remember, it’s not mine, though I made it my own by adding a few choice ingredients.
Above: the cakes are cooling in their 9x2 pans for 10 minutes before I flip them over.
Here’s my personal philosophy on chocolate:
1.      More is better.
2.     Semi-sweet is better than too sweet.
3.     Good chocolate requires depth of flavor (hidden touches of sea salt, ground cinnamon or allspice, espresso, vanilla, dark rum and cayenne and/or black pepper) so don’t be afraid to add little touches of these (in whatever combination you feel) to bring out the most from your chocolate.
4.     Go for the good stuff – it’s worth it in the end, and also easier to melt than the cheap stuff.
Above: the cakes have been taken out of the pans – I’m allowing them to cool completely before beginning the assembly process which will include slicing in half them with a long serrated knife….!

Once the cakes were made, then I’m no longer baking, I’m cooking – so I was back in my element.  It was time to make the frosting and the glaze (ganache).  These are fundamentally sauces – I’m the sauce KING, so no worries.
I selected a sour cream based frosting which I’ve used before - because it always works.  You will need 2 cups sour cream, 1 cup heavy whipping cream, 4 oz semi sweet chocolate, ½ cup fine cocoa powder, ¾ cup confectioner’s sugar, 1 teaspoon vanilla, ½ teaspoon sea salt, 1 teaspoon dark rum, 1 teaspoon really strong espresso, ¼ teaspoon allspice.
First blend the sugar with the heavy cream – don’t struggle – use your hand blender for this – get it to soft peaks.  Add in the sour cream, continue whipping till you get stiff peaks.  Don't have one?  Make the $12 investment - it's worth it.  In the meantime - you can obviously use a whisk, though it will be a workout.
Above: double whipped cream with little specs of ground allspice.
Combine all the other elements (except the cocoa powder) over double boiler (this is a simple pot of simmering water, a clean metal bowl – and a silicone spatula.  Make sure the chocolate is fully soft and smooth.  Take it off the heat and add in a large dollop of the double cream to cool it and thin it down.  Now transfer all the chocolate into the double cream.  After you’ve blended it thoroughly with the spatula (try not to deflate), add in the cocoa powder.
Above: The cocoa is about to be blended into the double sour cream chocolate mixture.  The result is a double chocolate frosting/filling: MMmmm.
Put on your surgeon’s hat and cut the cakes in half.  Do it slowly, try not to lose too much crumb and the straighter it is, the easier it will be to assemble.  [Remember, everything will be frosted so don’t sweat this unnecessarily and it can get a bit messy but to date, nobody’s died from a chocolate splatter on the floor]
Note:  Those crumbs were very tasty so I now know the cake is good.
I lined my fancy cake stand with wax paper strips and set the first half cake on top of the wax paper.  Frost the surface thoroughly and add on the next layer.  Frost the surface thoroughly and slice the next cake in half.
Above: frosting will help repair any little breaks that might happen as we try to remove the cake from the pans.  Who am I kidding, a little kitchen mouse (me) couldn’t help but have another taste!  The assembly is nearly complete.  Repeat the process and once you’ve got all four layers on the stand, cover with a light layer of this sour cream frosting.
Above: the cake has been thoroughly frosted – the rich sour cream frosting will be absorbed into the cake and it also hides any flaws.  Stick the cake in the fridge for a bit – this cooling down process is absolutely necessary here in Miami where the humidity works against you.
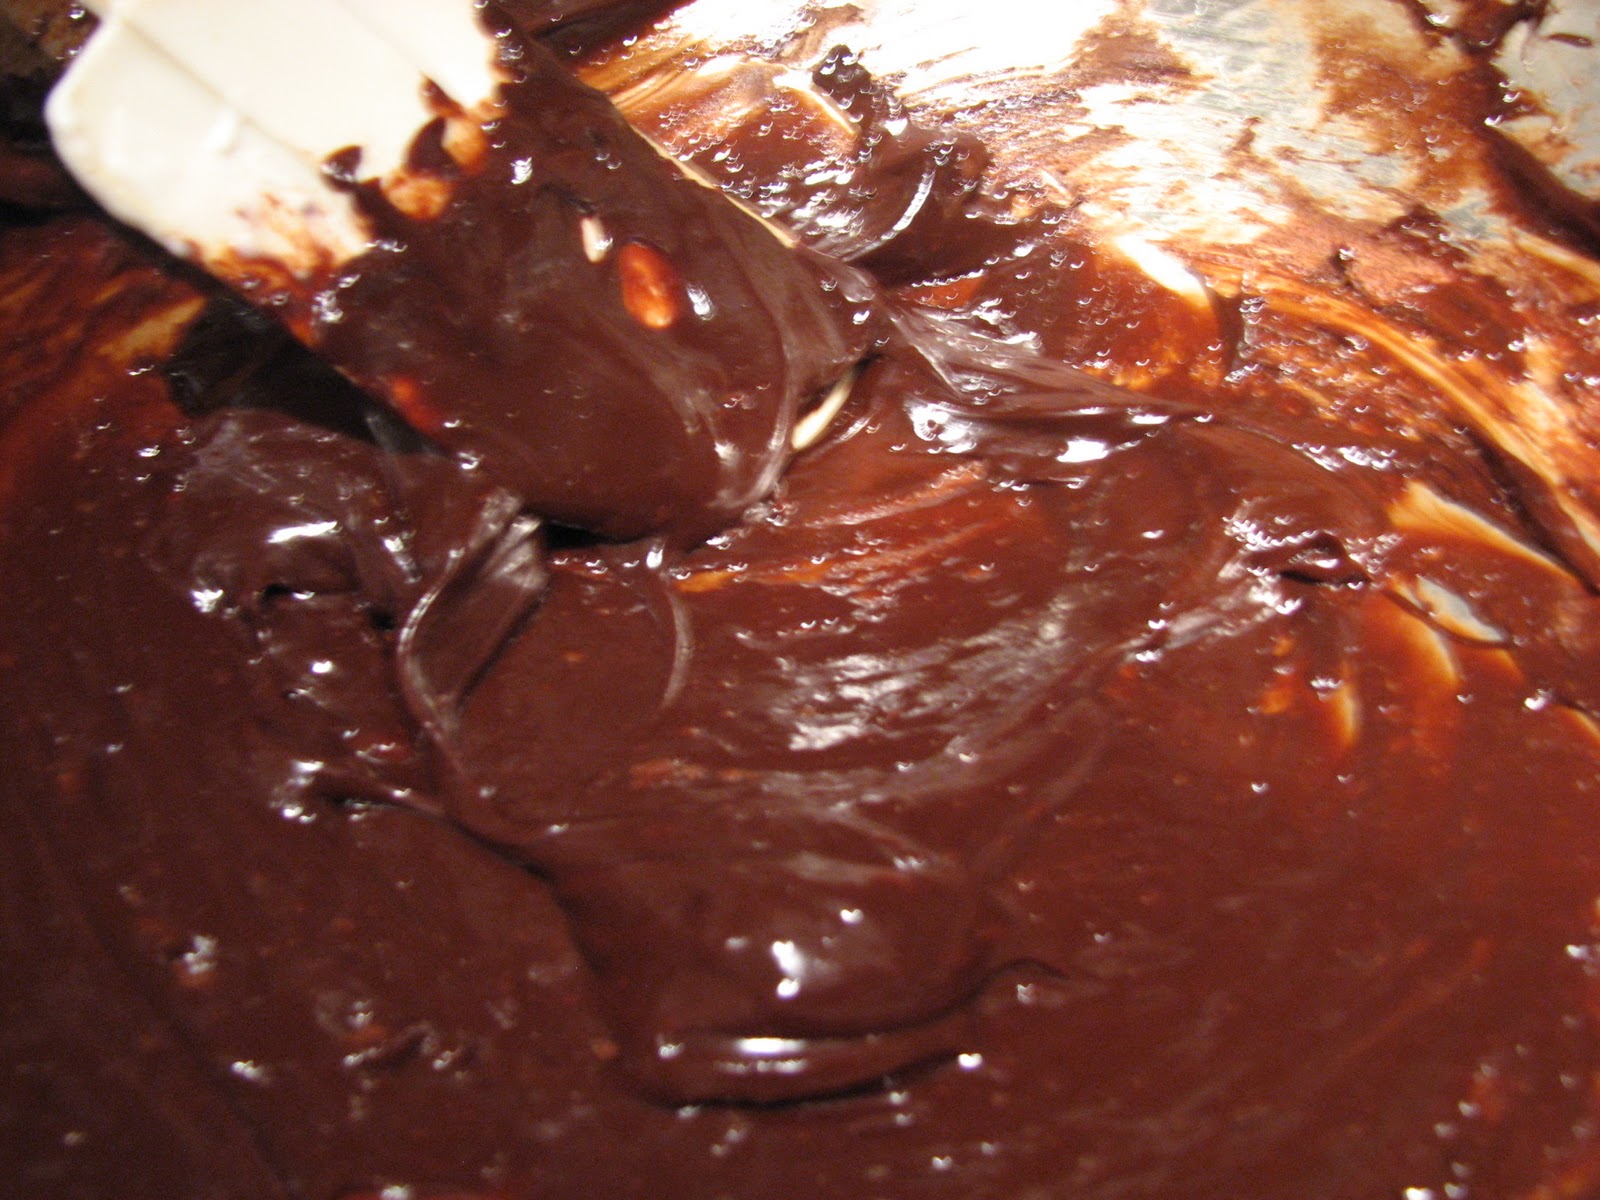
Now we can begin the final glaze.  You will need 4 oz of semi-sweet chocolate, 2 tablespoons of unsalted butter (please don’t use anything else – it just won’t work), 1 tablespoon of dark rum, a dash of allspice and a ½ teaspoon of vanilla.  All this goes into your metal bowl over slowly simmering water.  Mix thoroughly with a spatula till it is glossy and smooth.
Above:  keep mixing till everything comes together.  Here - it's already quite glossy from the butter and the rum.
Take it off the heat and before it begins to become a solid, glaze the top of your cake.  Then, back into the fridge it goes.
Above:  the warm ganache may drip down over the edges – that’s okay. 
Now, for the final step: I like to make something I call "chocolate sand" for the sides.  I take ¼ cup of roasted sunflower seeds, ¼ cup of semi-sweet chocolate morsels and ¼ cup of good cocoa powder – I pulse these in a grinder and spoon as much of it as possible onto the sides of the cake.  Once I’ve done this – I take the wax paper off and allow to cool overnight.
In the morning – I drove it to my sister’s where an emergency dose of chocolate was needed and we had it for breakfast.
Above: see how the cake absorbed all that rich frosting?  It was truly anything but bland.  The cake was firm but moist, the frosting had character, the glaze on top was a rich reward, and the chocolate sand had that beautiful touch of nut and subtle savory salt that made it all VERY adult.
Nevertheless, it did meet with kid approval, as the photos below show:
Above: my niece, a lovely but already surly teenager, preferred it to oatmeal.

Above: a slice of this sinfully good cake with fresh mulberries from my tree.....!
Above: my nephew enjoyed it with his vitamins… even though he couldn’t understand why it tasted “French” (his code for adult).  He also asked:  "Why didn't you just open a box?"
Let me know how this trip from my kitchen, travels to your table.

STOUT CHOCOLATE CAKE*:
  • 3 ounces semisweet chocolate, chopped
  • 1 ½ sticks (¾ cup) unsalted butter, softened
  • 1 ½ cups granulated sugar
  • ½  cup firmly packed light brown sugar
  • 1 ¾  cups sour cream
  • 1 ½ teaspoons vanilla extract
  • 3 large eggs
  • 2 cups all-purpose flour
  • ½ cup unsweetened cocoa powder (not Dutch-process)
  • 1 teaspoon baking soda
  • ½ teaspoon sea salt
  • ½ teaspoon allspice
  • 3 turns fresh ground black pepper (don’t bother with pre ground)
  • 1 dash cayenne pepper
Preaheat oven to 375°F. Butter and flour two 9- by 2-inch round cake pans, knocking out excess flour.
In a double boiler or a metal bowl set over a pan of barely simmering water melt chocolate, stirring until smooth, and cool.
In a large bowl with an electric mixer beat together butter and sugars until light and fluffy. Beat in sour cream and vanilla until combined. Add eggs, 1 at a time, beating well with after each addition.
In a bowl whisk together flour, cocoa powder, baking soda, and salt and gradually add to sour cream mixture, beating until just combined. Beat in chocolate until batter is just combined and divide between pans.
Bake layers in middle of oven until a tester comes out clean, about 30 minutes. Cool layers in pans on rack 10 minutes and invert onto racks to cook completely.
* Gourmet magazine – 1996